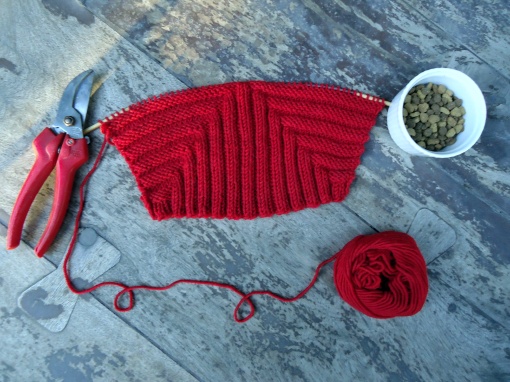
Last time I showed you a snippet of red ribbing. This time I thought it'd be fun to show you how it turned into a baby bonnet. It's a simple and clever pattern -- Pixie Hat -- that I knit up in superwash worsted wool. You start by knitting a rectangle that has vertical ribs transitioning into horizontal ribs.
(Here's the behind-the-scenes staging, by the way. It was on a short circular needle that wanted to curl in. I was holding it down with whatever was sitting on the patio table, which happened to be hand-clippers and a ramekin dish of cat kibbles. Cracked me up.)
Once you have the rectangle done, you're supposed to bind off, fold it in half, and sew it up the back. Some people have instead done a three-needle bind-off. I did one better, I think, by NOT binding off and instead grafting the back seam together. I put the stitches on two dpns and folded the rectangle in half:
Here's what the bottom tips of the dpns look like at this point:
You start grafting those lines of stitches:
Here's what it looks like if you were to spread the back flat. You can see how the grafting blends in to make it look like continuous ribbing:
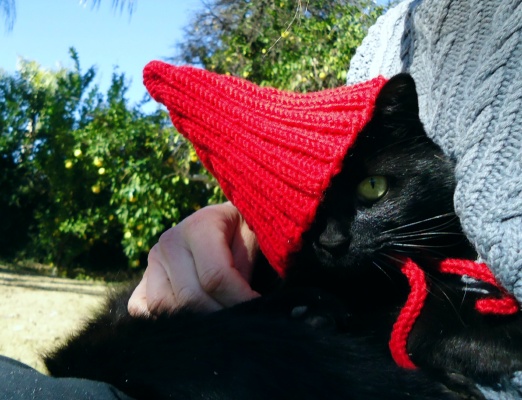
Once it's done, you have a very stretchy and hilariously pointy bonnet. The pattern ends there -- without any ties. Some folks have added a garter band that buttons under the chin. I decided to do an attached I-cord band along the bottom. It looks so streamlined and ties easily (though perhaps a stretch garter band would be more functional?).
Since it's hard to see it when it's flat, I grabbed the only live "model" I had hanging around. She was too wiggly and had inconveniently pointy ears. Did not work out so well.
But here you can see it on a very, very large ball of bulky yarn. Turned out adorable!


Very cute! Not sure the cat likes it very much though. ;-)
ReplyDeleteFun post and tutorial. Grazie!
ReplyDeleteI had been wondering what that red thing was from your last post. The bonnet is actually very cute, especially on the kitty! Who is it for?
ReplyDelete